@SpringBootApplication注解
在入口类文件{artifactId}Application.java中,我可以看到有这样一个注解@SpringbootApplication,这个注解的作用是开启Spring组件扫描和开启SpringBoot自动配置,它其实是将三个注解组合在了一起:
·Spring的@Configuration:标明该类使用Spring基于Java的配置
·Spring的@ComponentScan:启用组件扫描,编写的Web控制器类和组件才能被自动发现并注册为Spring应用程序上下文里的Bean
·SpringBoot的@EnableAutoConfiguration:也可以称为@Abracadabra,让Spring Boot根据类路径中的jar包依赖进行SpringBoot自动配置
如果想要关闭特定的自动配置可以使用@SpringBootApplication的exclude参数
@SpringBootApplication(exclude =xxxx.class )属性配置
打开项目配置文件application.properties,将默认端口8080设置为8081,将默认访问路径“/”修改为“/people”
server.port=8081
server.context-path=/people
运行项目,在浏览器输入之前的地址可以看到无法访问,这时我们需要输入的地址为http://localhost:8081/people/hello, 可以看到界面输出了“Hello Spring Boot!”
application.properties是默认的配置文件,当然也可以新建application.yml作为项目的配置文件,那么格式应该如下这样
server:
    port: 8080
    context-path: /people
如果application.yml和application.properties在同一位置,那么application.yml里的属性会覆盖application.properties里的属性
注入properties文件里的值
修改HelloContr.java控制器类
package com.chengzequn;
import org.springframework.beans.factory.annotation.Value;
import org.springframework.web.bind.annotation.RequestMapping;
import org.springframework.web.bind.annotation.RequestMethod;
import org.springframework.web.bind.annotation.RestController;
@RestController
public class HelloController {

    @Value("${people.name}")
    private String name;
    @Value("${people.age}")
    private String age;

    @RequestMapping(value = "/",method = RequestMethod.GET)
    public String people() {
        return "姓名:"+name+",年龄:"+age;
    }
}
在application.properties中添加属性,如果属性值为汉字要转为ASCII字符,如“张三”转为“\u5f20\u4e09”
people.name=Zhang San
people.age=20
运行应用程序,在浏览器可以看到输出“姓名:Zhang San,年龄:20”
基于properties的类型安全的配置
上面使用@Value注入每个配置在实际项目中会显得格外麻烦,Spring Boot还提供了基于类型安全的配置方式,通过@ConfigurationProperties将properties属性和一个Bean及其属性关联,从而实现安全的配置
将HelloController.java修改为如下代码
package com.chengzequn;
import org.springframework.boot.context.properties.ConfigurationProperties;
import org.springframework.web.bind.annotation.RequestMapping;
import org.springframework.web.bind.annotation.RequestMethod;
import org.springframework.web.bind.annotation.RestController;
@RestController
@ConfigurationProperties(prefix = "people")
public class HelloController {

    private String name;
    private int age;

    public void setName(String name) {
        this.name = name;
    }

    public String getName() {
        return name;
    }

    public void setAge(int age) {
        this.age = age;
    }

    public int getAge() {
        return age;
    }

    @RequestMapping(value = "/",method = RequestMethod.GET)
    public String people() {
        return "姓名:"+name+",年龄:"+age;
    }
}
application.properties内的属性不变
people.name=\u5f20\u4e09
people.age=22
运行应用程序,在浏览器可以看到输出“姓名:张三,年龄:22”
在配置中在使用当前配置
application.properties内的属性如下,content使用了之前的name和age
people.name=\u5f20\u4e09
people.age=22
content:name:${people.name},age=${people.age}
在HelloController.java修改代码使程序打印出content测内容
package com.cheng.springboot;
import org.springframework.beans.factory.annotation.Value;
import org.springframework.web.bind.annotation.RequestMapping;
import org.springframework.web.bind.annotation.RequestMethod;
import org.springframework.web.bind.annotation.RestController;

@RestController
public class HelloController {

    @Value("${people.name}")
    private String name;

    @Value("${people.age}")
    private Integer age;

    @Value("${content}")
    private String content;

    @RequestMapping(value = "/hello",method = RequestMethod.GET)
    public String say(){
        return content;
    }
}
运行程序,页面输出name:张三,age=22
使用@Autowired自动装配属性,以便多次使用
application.properties内的属性如下
people.name=\u5f20\u4e09
people.age=22
新建PeopleProperties.java
package com.cheng.springboot;
import org.springframework.boot.context.properties.ConfigurationProperties;
import org.springframework.stereotype.Component;

@Component
@ConfigurationProperties(prefix = "people")
public class PeopleProperties {
    private String name;

    private Integer age;

    public String getName() {
        return name;
    }

    public void setName(String name) {
        this.name = name;
    }

    public Integer getAge() {
        return age;
    }

    public void setAge(Integer age) {
        this.age = age;
    }
}
HelloController.java代码如下
package com.cheng.springboot;

import org.springframework.beans.factory.annotation.Autowired;
import org.springframework.web.bind.annotation.RequestMapping;
import org.springframework.web.bind.annotation.RequestMethod;
import org.springframework.web.bind.annotation.RestController;

@RestController
public class HelloController {

    @Autowired
    private PeopleProperties peopleProperties;

    @RequestMapping(value = "/hello",method = RequestMethod.GET)
    public String say(){
        return peopleProperties.getName();
    }
}
运行程序,页面输出:张三
开发环境和生产环境配置不同
新建application-dev.properties文件
server.port:8081
people.name=\u5f20\u4e09
people.age=24
新建application-prod.properties文件
server.port:8080
people.name=zhangsan
people.age=22
将默认的application.properties文件内容改为如下
spring.profiles.active:dev运行程序访问http://localhost:8081/hello ,页面输出:张三
如果我们需要运行生产环境的配置,则只需将applic.properties中的dev改为prod,然后访问相应的地址即可
| 注解 | 用法 |
|---|---|
| @Controller | 处理http请求 |
| @RestController | Spring4之后新加的注解,原来返回json需要@ResponseBody |
| 配合@Controller | |
| @RequestMapping | 配置url映射 |
我们将HelloController.java中的@RestController改为@Controller,运行程序页面出错,这是因为@Controller需要配合相应的模板使用,name我们在pom.xml中加入相应需要的模板
<dependency>
    <groupId>org.springframework.boot</groupId>
    <artifactId>spring-boot-starter-thymeleaf</artifactId>
</dependency>
在resource文件夹下新建templates/index.html
<h1>Hello Spring Boot!</h1>修改HelloController.java文件
package com.cheng.springboot;

import org.springframework.stereotype.Controller;
import org.springframework.web.bind.annotation.RequestMapping;
import org.springframework.web.bind.annotation.RequestMethod;

@Controller
public class HelloController {

    @RequestMapping(value = "/hello",method = RequestMethod.GET)
    public String say(){
        return "index";
    }
}
运行程序,可以看到模板生效,输出:Hello Spring Boot!
当然实际开发中我们可能不建议使用模板,那么我们需要增加一个@ResponseBody注解即可
package com.cheng.springboot;

import org.springframework.beans.factory.annotation.Autowired;
import org.springframework.stereotype.Controller;
import org.springframework.web.bind.annotation.RequestMapping;
import org.springframework.web.bind.annotation.RequestMethod;
import org.springframework.web.bind.annotation.ResponseBody;

@Controller
@ResponseBody
public class HelloController {

    @Autowired
    private PeopleProperties peopleProperties;

    @RequestMapping(value = "/hello",method = RequestMethod.GET)
    public String say(){
        return peopleProperties.getName();
    }
}
运行程序,页面输出:张三
当我们需要访问不同的地址而返回相同的页面时,我们只需在@RequestMapping注解的value值改为{“/hello”,”/hi”},这样不论我们访问/hello,还是/hi都会输出相应的内容
我们还可以在为整个类指定url,在类外添加@RequestMapping(value = “/people”),这样我们访问时就需要拼接起来访问http://localhost:8081/people/hello 访问相应的方法
@PathVariable 获取url中的数据
@RequestParam 获取请求参数值
@GetMapping 组合注解
修改HelloController.java用来请求参数
package com.cheng.springboot;

import org.springframework.web.bind.annotation.PathVariable;
import org.springframework.web.bind.annotation.RequestMapping;
import org.springframework.web.bind.annotation.RequestMethod;
import org.springframework.web.bind.annotation.RestController;

@RestController
@RequestMapping(value = "people")
public class HelloController {

    @RequestMapping(value = "/hello/{str}",method = RequestMethod.GET)
    public String say(@PathVariable("str") String str){
        return "str:"+str;
    }
}
运行程序,访问地址并加入参数如http://localhost:8081/people/hello/spring ,页面输出spring
我们还可以修改HelloController.java成下面这样的来传递参数
package com.cheng.springboot;
import org.springframework.beans.factory.annotation.Autowired;
import org.springframework.web.bind.annotation.RequestMapping;
import org.springframework.web.bind.annotation.RequestMethod;
import org.springframework.web.bind.annotation.RequestParam;
import org.springframework.web.bind.annotation.RestController;

@RestController
@RequestMapping(value = "people")
public class HelloController {

    @Autowired
    private PeopleProperties peopleProperties;

    @RequestMapping(value = "/hello",method = RequestMethod.GET)
    //@RequestParam的参数还有required是否必须传值,defaultValue默认值
    public String say(@RequestParam("str") String string){
        return "str:"+string;
    }
}
运行程序,这时候我们就需要这样访问http://localhost:8081/people/hello?str=spring ,页面输出:str:spring
@GetMapping(value=”/hello”)等同于@RequestMapping(value = “/hello”,method = RequestMethod.GET)
@PutMapping(value=”/hello”)等同于@RequestMapping(value = “/hello”,method = RequestMethod.POST)
数据库操作
Spring-Date-Jpa
JPA(Java Persistence API)定义了一系列对象持久化的标准,目前实现这一规范的产品有HIbernate、TopLink等
Spring-Date-Jpa即是对HIbernate的整合
RESTful API
|请求类型|请求路径|功能| |:—-|:—-|:—-| |GET|/people|获取people列表| |—- |POST|/people|创建一个people| |—- |GET|/people/id|通过id查询people| |—- |PUT|/people/id|通过id更新people| |—- |DELETE|/people/id|通过id删除people| |=====
需要添加的依赖
<!-- 数据库操作 -->
<dependency>
    <groupId>org.springframework.boot</groupId>
    <artifactId>spring-boot-starter-data-jpa</artifactId>
</dependency>

<dependency>
    <groupId>mysql</groupId>
    <artifactId>mysql-connector-java</artifactId>
</dependency>
在application.properties中配置数据库相关信息
spring.datasource.driver-class-name:com.mysql.jdbc.Driver
spring.datasource.url:jdbc:mysql://127.0.0.1:3306/dbpeople
spring.datasource.username=root
spring.datasource.password=123456
spring.jpa.hibernate.ddl-auto=create
#create:运行时重新创建;update:如果有,则不重新创建;create-drop:运行停止删除表;
spring.jpa.show-sql=true
建立people.java类
package com.cheng.springboot;

import javax.persistence.Entity;
import javax.persistence.GeneratedValue;
import javax.persistence.Id;

@Entity
public class People
{
    @Id
    @GeneratedValue
    private Integer id;

    private String name;

    private String password;

    public People() {
    }

    public People(String name, String password) {
        this.name = name;
        this.password = password;
    }

    public Integer getId() {
        return id;
    }

    public void setId(Integer id) {
        this.id = id;
    }

    public String getName() {
        return name;
    }

    public void setName(String name) {
        this.name = name;
    }

    public String getPassword() {
        return password;
    }

    public void setPassword(String password) {
        this.password = password;
    }
}
运行程序,可以看到数据库中自动生成了一张people表
设计建立接口
新建PeopleController.java类
package com.cheng.springboot;
import org.springframework.beans.factory.annotation.Autowired;
import org.springframework.web.bind.annotation.GetMapping;
import org.springframework.web.bind.annotation.RestController;
import java.util.List;

@RestController
public class PeopleController {

    @Autowired
    private PeopleRepository peopleRepository;

    /**
        * 查询所以people
        * @return
        */
    @GetMapping(value = "/people")
    public List<People> peopleList(){
        return peopleRepository.findAll();
    }
}
新建PeopleReposities.java接口类
package com.cheng.springboot;
import org.springframework.data.jpa.repository.JpaRepository;
public interface PeopleRepository extends JpaRepository<People,Integer> {
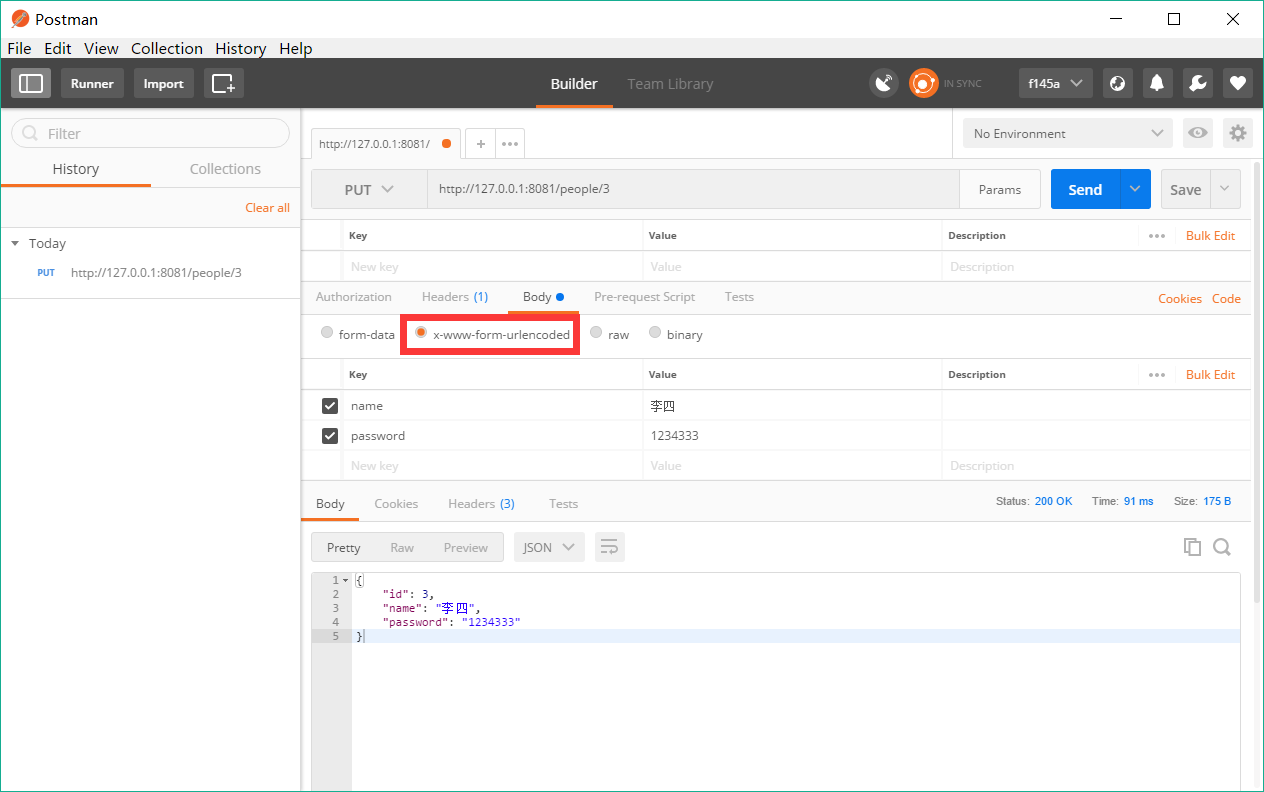
}用postman测试接口,可以看到返回相应结果

相应的我们写上添加、根据id查询、更新、删除的方法
package com.cheng.springboot;
import org.springframework.beans.factory.annotation.Autowired;
import org.springframework.web.bind.annotation.*;
import java.util.List;
@RestController
public class PeopleController {

    @Autowired
    private PeopleRepository peopleRepository;

    /**
        * 查询所以people
        * @return
        */
    @GetMapping(value = "/people")
    public List<People> peopleList(){
        return peopleRepository.findAll();
    }

    /**
        * 添加一个people
        * @param name
        * @param password
        * @return
        */
    @PostMapping(value = "/people")
    public People peopleAdd(@RequestParam("name")String name,@RequestParam("password") String password){
        People people=new People(name,password);
        return peopleRepository.save(people);
    }

    /**
        * 根据id查询一个people
        * @param id
        * @return
        */
    @GetMapping(value="/people/{id}")
    public People peopleFindOne(@PathVariable("id")Integer id){
        return peopleRepository.findOne(id);
    }

    /**
        * 更新people
        * @param id
        * @param name
        * @param password
        * @return
        */
    @PutMapping(value = "/people/{id}")
    public People peopleUpdate(@PathVariable("id")Integer id,
                                @RequestParam("name")String name,
                                @RequestParam("password")String password){
        People people=new People(id,name,password);
        return peopleRepository.save(people);
    }

    /**
        * 根据id删除people
        * @param id
        */
    @DeleteMapping(value = "/people/{id}")
    public void peopleDelete(@PathVariable("id")Integer id){
            peopleRepository.delete(id);
    }
}
并测试相应接口
如果我们想要通过名字或年龄查询people
在PeopleRepository.java中添加接口
package com.cheng.springboot;
import org.springframework.data.jpa.repository.JpaRepository;
import java.util.List;
public interface PeopleRepository extends JpaRepository<People,Integer> {

    //通过年龄查询
    public List<People> findByName(String name);
}
在PeoplController.java中添加方法
//通过名字查询people
@GetMapping(value = "/people/name/{name}")
public List<People> peopleListByName(@PathVariable("name")String name){
    return peopleRepository.findByName(name);
}
事务管理
新建PeopleService.java
package com.cheng.springboot;
import org.springframework.beans.factory.annotation.Autowired;
import org.springframework.stereotype.Service;
@Service
public class PeopleService {

    @Autowired
    private PeopleRepository peopleRepository;

    @Transactional
    public void insertTwo(){
        People peopleA=new People("AAA","aaaa");
        peopleRepository.save(peopleA);
        People peopleB=new People("BBB","bbbb");
        peopleRepository.save(peopleB);
    }
}
在PeopleController.java中建立方法
@RestController
public class PeopleController {

    @Autowired
    private PeopleService peopleService;

    @PostMapping(value = "/people/two")
    public void peopleTwo(){
        peopleService.insertTwo();
    }

}